The Best Dash Cam for a Tesla Model 3, Decided on the Specs That Matter
Resolution is the headline number; it is rarely the deciding one. This page leads with a real spec matrix, then weighs sensor quality, parking power draw and how invisible the camera stays in a minimalist cabin. Five cams, compared the way an engineer would.
Updated June 2026·16 min read·Specs normalised and night-capture behaviour weighed, not marketing copy
A dash cam is a measuring instrument bolted to your windscreen, and like any instrument it is only as good as the weakest link in its signal chain. For a Tesla Model 3 that chain runs from a small lens, through an image sensor, into a processor that compresses the footage, and onto a card, all while sipping power from a 12V system that is more sensitive than the one in a normal car. Shop by the biggest number on the box and you optimise the wrong link. A cheap 4K cam with a poor sensor will hand you a sharp, detailed picture of a smudge where a number plate used to be.
So this page does not open with a ranking. It opens with a matrix that lays the five cams side by side on the variables that actually move the decision: real resolution, the image sensor behind it, how much power the cam draws while parked, how visible it is in the cabin, and whether it can upload to the cloud on impact. Read the matrix, run the picker, then drop into the per-cam verdicts where each call is explained, not asserted. The aim is that by the end you could defend your own choice on the specs, not on which brand shouted loudest.
Two framing facts before the data. First, a Model 3 already records through Sentry Mode and its built-in cameras, so an aftermarket cam has to earn its place by adding something the car does not do well: a front view with a better sensor and higher bitrate, audio, and a parking mode that does not lean on the car battery the way Sentry does. Second, the cabin is the constraint. The Model 3 interior is deliberately bare, and a bulky screen cam stuck to the glass undoes that in a way most owners regret within a week. Keep both in mind and the field narrows quickly.
Compare
The Tesla Model 3 dash cam comparison matrix
These are the five variables that actually decide a Model 3 install, in one view. Resolution is here, but read across to the sensor and the form factor before you weight it. Tap a cam name to jump to its full verdict.
Prices move constantly, so we use tiers rather than figures. Resolution and sensor descriptions are normalised from manufacturer specs and hands-on reports, not bench-measured by us.
Interactive
Find the right dash cam for your Tesla Model 3
Pick your top priority and whether you want a rear camera. The picker returns the cam that fits, with the reasoning spelled out, not just a name.
Set two things
The picker weights the spec that decides night footage first, then your form-factor and budget constraints.
Your matchVIOFO A229 Pro
4K, Sony STARVIS 2, screenless
Night plate reads are decided by the sensor, not the resolution. The A229 Pro pairs a Sony STARVIS 2 sensor with a screenless body that hides behind the mirror, so you get the best low-light footage without cluttering a Model 3 interior.
A buying guide, not a fitting service. Confirm hardwiring suits your car before install.
The verdicts
A closer look at each best dash cam for tesla model 3
Each card explains the call rather than asserting it: the mechanism first, then who it suits and what it gives up. One link per cam.
Best overall
Price: Step-up
Sensor: Sony STARVIS 2 (IMX678)
Parking: Low, hardwire kit with buffered parking modes
Best for: Most Model 3 owners who want the best night capture without a screen in the cabin
VIOFO A229 Pro
The cam that wins on the spec that matters most: a STARVIS 2 sensor reading plates at night, in a screenless body that disappears behind the mirror.
4K front (2160p)Sony STARVIS 2 (IMX678)Compact, screenless body that hides behind the mirrorCloud: No (WiFi app only)Price: Step-up
Start with the sensor, because that is where this cam earns the top spot. The A229 Pro uses a Sony STARVIS 2 sensor, the generation built specifically to lift the signal-to-noise ratio in low light. The mechanism matters here: at night a number plate is a small, retroreflective patch surrounded by glare from headlights, and what decides legibility is not how many pixels the cam captures but how cleanly each pixel separates real detail from sensor noise. STARVIS 2 widens that margin, which is why this cam resolves plates a stop or two of light below where a cheaper 4K cam gives up. The body is screenless and compact, so it tucks behind the rear-view mirror and leaves the Model 3 interior as bare as Tesla intended. It is a true 2-channel system, so a rear camera runs off the same install. On power, the supplied hardwire kit offers buffered parking modes with a configurable voltage cutoff, so it monitors while parked without flattening the 12V battery. The honest limitation is cloud: there is no over-the-air upload, so footage stays on the card until you pull it over WiFi. If you want remote alerts the moment something happens, that is the BlackVue's job. For everyone else, this is the cam to beat.
Strengths
✓Sony STARVIS 2 sensor pulls clean, low-noise footage after dark, where plate reads are won or lost
✓Screenless 2-channel design keeps the Model 3 cabin clean and supports a rear camera on one wire run
✓Hardwire kit with voltage-cutoff parking modes draws little current, friendlier to the 12V system
Watch-out
-No native cloud, so impact uploads happen over WiFi when the car is in range, not over the air anywhere
Parking: Low; cloud upload on impact via WiFi or optional LTE
Best for: Owners who want true remote alerts and a better Sentry, and will pay for it
BlackVue DR970X Plus
The cam that turns parking surveillance into a phone notification: cloud upload on impact, in the most discreet body of the group.
4K frontSony STARVIS-class sensorSlim cylindrical body, very low visual profileCloud: Yes (WiFi or LTE cloud)Price: Premium
The DR970X Plus answers a different question from the VIOFO: not just what the cam sees, but what happens to that footage the instant something occurs. Its defining feature is cloud connectivity. Over WiFi, or over an optional LTE module, an impact or parking event can push a clip off the vehicle to BlackVue's servers in near real time. Consider the failure mode it removes: Tesla's Sentry Mode records locally, so a determined thief who takes the car or the camera takes the evidence with it. A cam that has already uploaded the clip defeats that. The sensor is a Sony STARVIS-class part that delivers clean 4K, a clear step above the built-in cameras, though the headline reason to buy this one is the connectivity rather than a sensor edge over the A229 Pro. Physically it is the most Model-3-appropriate shape in the test: a slim cylinder that lies along the glass behind the mirror and reads as part of the car rather than an accessory. The cost is exactly what you would expect. It sits at the premium end, and the cloud features that justify it work best on a paid LTE plan, an ongoing expense the others do not carry. If remote peace of mind is the point, it is worth it; if it is not, you are paying for a feature you will not use.
Strengths
✓Cloud connectivity pushes event clips off the car on impact, so footage survives even if the cam does not
✓Slim cylindrical shape sits flat against the glass and is the least obtrusive shape here
✓Mature app and parking event handling make it a genuine upgrade over relying on Sentry alone
Watch-out
-Premium price, and the most useful cloud features lean on an optional LTE plan with a recurring cost
Sensor: Standard 1080p sensor (no STARVIS 2 claim)
Parking: Very low; tiny body, optional parking-mode cable
Best for: Minimalists who want a camera that is genuinely invisible and accept 1080p
Garmin Dash Cam Mini 2
The cam you forget is there: roughly the size of a key fob, it vanishes behind the mirror, with 1080p as the trade.
1080p frontStandard 1080p sensor (no STARVIS 2 claim)Key-fob sized, fully hidden behind the mirrorCloud: No (app only)Price: Budget
If your priority is that no one, including you, notices the camera, the Mini 2 is the answer, and the engineering trade it makes is honest. At roughly the size of a key fob it is the smallest cam in this group by a clear margin, and behind a Model 3 mirror it disappears completely, which is exactly the brief for an interior designed around emptiness. It has no screen, so you manage it through Garmin's app, and its power draw is low enough that an optional parking-mode cable adds little load. The deliberate compromise is resolution and sensor. This is a 1080p camera with a competent but ordinary sensor, not a STARVIS 2 part, so on raw image quality it sits below the 4K cams here. In daylight that gap is modest and it captures the scene cleanly. At night, and at distance, it gives up fine detail sooner, so a plate two cars ahead under poor lighting is more likely to be unreadable than it would be on the A229 Pro. Read that as a clear-eyed exchange rather than a flaw: you are trading some forensic detail for a camera that is truly invisible and trouble-free. For an owner who values the clean cabin above all and treats the cam as insurance rather than evidence-grade kit, it is the right call.
Strengths
✓Smallest body here by a wide margin, effectively invisible behind the Model 3 mirror
✓Very low power draw and a simple app-based workflow with no screen to manage
✓Excellent build and a clean app, an easy, no-drama camera to live with
Watch-out
-1080p only, so it captures less fine detail and trails the 4K STARVIS 2 cams on night plate reads
Best for: Owners who want STARVIS 2 night quality without paying the top-tier price
70mai A810
The value play that refuses to cut the corner that counts: a STARVIS 2 sensor at a mid-range price.
4K frontSony STARVIS 2Compact body with a small screenCloud: No (WiFi app only)Price: Mid-range
The A810 is the cam to reach for when budget is real but you are not willing to give up the one spec that actually decides night performance. Crucially, it uses a Sony STARVIS 2 sensor, the same generation as the more expensive A229 Pro, which means it carries most of the low-light advantage that separates a usable night plate read from a noisy blur, at a mid-range price. That is the whole argument for it: the corner most value cams cut is the sensor, and this one does not. In daylight it resolves clean 4K detail well beyond anything the built-in Tesla cameras offer, and its hardwire kit supports a parking mode with a low enough draw to leave the 12V system alone overnight. The trade against the top pick is form factor and polish rather than image quality. It carries a small screen and is a touch bulkier than the screenless A229 Pro, so it is marginally more visible behind the mirror, and its app and parking logic, while good, are a step behind the most refined units. None of that touches the footage. If you want the sensor that matters at the price that does not hurt, this is the efficient choice.
Strengths
✓Sony STARVIS 2 sensor delivers most of the night-capture benefit of pricier cams for less money
✓Hardwire kit enables a low-draw parking mode suitable for regular Sentry-style surveillance
✓Strong 4K daytime detail and a capable app put it well above budget cams on pure image quality
Watch-out
-Has a small screen and a slightly larger footprint than the screenless picks, marginally less stealthy
Best for: Budget buyers who want front and rear coverage in one kit and accept the compromises
RedTiger F7N
The most coverage per dollar: a 4K front plus a rear camera in one budget kit, with eyes-open compromises.
4K front, 1080p rearEntry-tier 4K sensorLarger body with a built-in screenCloud: No (WiFi app only)Price: Budget
The F7N exists to answer a budget question honestly: how do you cover both the front and the rear of the car for the least money. As a front-and-rear kit at a budget price it does that, and its 4K front footage is a real upgrade over having no dedicated front camera at all. But the engineering trade-offs are where the test-engineer voice has to be blunt. The sensor is an entry-tier 4K part, not STARVIS 2, so it captures plenty of pixels but with a narrower signal-to-noise margin; in daylight it is fine, and at night it surrenders plate detail sooner than the Sony-sensor cams. The body is larger and carries a screen, which makes it the most visible install here, the opposite of what a Model 3 cabin wants, and its parking mode draws more than the leaner units, so hardwiring and a sensible voltage cutoff matter more, not less. The rear camera is a genuine plus for rear-end and following-distance evidence, just hold realistic expectations for its 1080p night performance. Buy it when total cost and dual coverage outrank stealth and low-light fidelity. If those priorities flip, the cams above are the better instruments.
Strengths
✓Front and rear cameras included in one inexpensive kit, the cheapest way to cover both ends
✓Capable 4K daytime footage that comfortably beats phone-grade or no front coverage at all
✓Built-in screen makes initial aiming and playback simple without an app
Watch-out
-Entry-tier sensor and a bulkier screen body mean weaker night reads and a more visible install than the picks above
A Model 3 is not a generic car with a 12V socket. Three things about it reshape which cam is right: a power system that punishes parasitic draw, a built-in surveillance feature that an aftermarket cam has to beat rather than duplicate, and a cabin that rejects bulk. Here is the mechanism behind each.
Parasitic draw and the sensitive 12V system
Every cam left armed while parked pulls a small, continuous current. In a Model 3 that current comes from a low-capacity 12V battery, which the high-voltage pack tops up on a schedule rather than continuously. Draw too much for too long and you can wake the car repeatedly or, in older 12V batteries, flatten it. This is why a cam's parking-mode draw and its hardwire kit's voltage-cutoff setting matter more here than in a combustion car. Lower draw and a conservative cutoff let the cam watch overnight without dragging the system down. It is the single most Tesla-specific spec on this page.
Sentry Mode versus an aftermarket parking mode
Tesla's Sentry Mode already records around the car when parked, so a dash cam must add something it lacks. Two things stand out. First, Sentry leans hard on the battery and stores everything locally, so the footage and the camera can be stolen together; an aftermarket cam with low draw, or one that uploads to the cloud, closes both gaps. Second, Sentry's clips come from the car's wide cameras at the car's bitrate. A dedicated front cam with a better sensor and a higher bitrate gives a sharper, more usable forward record. Treat the aftermarket cam as a complement to Sentry, focused on the front view, audio and resilience, not a replacement for it.
Supercapacitor versus lithium-ion in a hot cabin
A parked car in summer turns its cabin and windscreen zone into an oven, and that is exactly where a dash cam lives. Cams store their shutdown charge in one of two ways. A lithium-ion cell is energy-dense but degrades and can swell in sustained heat, which is a real concern for a camera baking on the glass all day. A supercapacitor holds less charge but tolerates high temperatures far better and lasts longer under thermal stress. For a Tesla that parks outdoors, a supercapacitor cam is the more durable instrument, which is one reason the stronger picks here use them and the budget units more often do not.
What an aftermarket cam adds over the built-in cameras
The Model 3's own cameras are wide-angle, shared with Autopilot, and recorded at a modest bitrate without audio. A purpose-built dash cam adds a higher bitrate for cleaner motion and more legible plates, in-cabin audio that can matter in a dispute, a better-placed and better-tuned front sensor, and a parking mode you control independently of the car. The gain is concentrated at the front of the car and at night, which is precisely where evidence quality is most contested. That is the value an aftermarket cam has to deliver to justify the install, and the sensor-led picks above are the ones that deliver it.
Spec hierarchy
What actually matters: the spec hierarchy for night plate capture
If you rank the specs in the order they affect real footage, resolution is not at the top. Here is the hierarchy a test engineer would use, with the mechanism for each so you can weight them yourself.
Sensor quality beats resolution
Resolution sets the maximum detail a frame can hold; the sensor decides how much of that detail is real rather than noise. At night the limiting factor is light, and a Sony STARVIS or STARVIS 2 sensor captures a cleaner signal in the dark than a generic sensor of the same megapixel count. A 1080p STARVIS 2 frame can out-resolve a plate at night that a cheap 4K sensor turns to mush. Read the sensor line first, then the resolution.
Bitrate is the hidden spec
After the sensor captures the image, the processor compresses it to fit on the card, and bitrate is how much data it keeps. Two 4K cams can look identical in a still and diverge sharply in motion, because the one with the lower bitrate throws away detail in exactly the fast-moving frames where a plate flashes past. Bitrate is rarely advertised prominently, but it is why the better-engineered cams produce more legible video from the same resolution. When you can find the figure, higher is better.
Night license-plate legibility
The hardest job a dash cam has is reading a retroreflective plate at night, lit by your own headlights against surrounding glare. It demands good high-dynamic-range handling so highlights do not bloom, a sensor with low noise, and enough bitrate to preserve the small high-contrast characters. This is the scenario that separates the cams here, and it is why the sensor-led picks justify their price: the footage you most need is the footage shot in the worst light.
Field of view and HDR
A wider field of view captures more of the scene but spreads the same pixels thinner, shrinking distant detail, so very wide angles trade plate legibility for context. HDR, meanwhile, lets the sensor hold both bright headlights and dark shadow in one frame instead of blowing out one to expose the other. For a Model 3, a sensible field of view paired with effective HDR beats the widest possible lens, because the forensic value is in the detail, not the panorama.
Frame rate and rolling shutter
Most cams shoot around 30 frames per second, which is enough for evidence, but the way the sensor reads each frame matters too. A slow rolling-shutter readout can smear or skew fast objects, including plates on oncoming traffic. It is a second-order effect behind sensor and bitrate, but it is part of why two cams with identical headline numbers can differ on a plate read at speed. Do not chase frame rate at the expense of the specs above it.
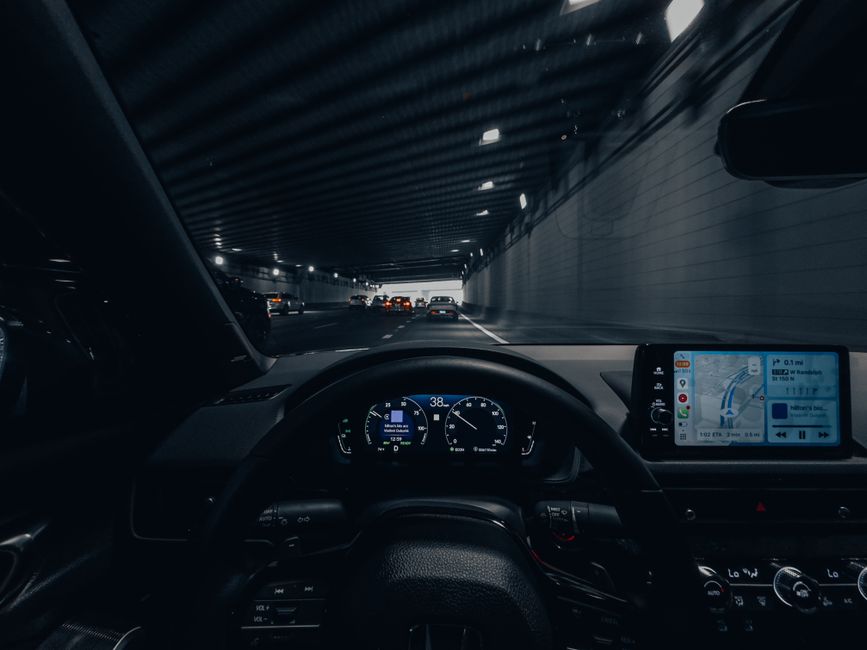
Photo: Allen Boguslavsky / PexelsInstall
Installing and hardwiring a dash cam in a Tesla Model 3
Parking mode and a clean look both depend on hardwiring rather than running off the 12V socket. The Model 3 has its own quirks for this. These steps describe the general approach; if you are not comfortable working near the fuse area, have a Tesla-experienced installer do it.
Plan the camera position first: behind the rear-view mirror, high and central on the windscreen, where the body hides from the cabin and the lens sits in the wiper-swept zone for a clear view in rain.
Choose a hardwire kit over the cigarette-style socket. A kit lets you tap a switched and a constant power source so the cam runs while driving and stays armed in parking mode, and it keeps the cabin free of dangling cables.
Route the cable up into the headliner, across to the A-pillar, and down the pillar trim to the footwell. Tuck it under the trim with a plastic pry tool rather than forcing it, so you do not mar the panels or pinch the wire.
Tap power at the appropriate fuse or accessory point and fit an inline fuse on the kit. The Model 3's low-voltage layout differs from a combustion car, so follow a Tesla-specific guide for the exact tap point rather than guessing.
Set a conservative voltage cutoff in the cam's parking settings. This is the safeguard that stops the cam from drawing the 12V battery down too far; err on the cautious side so the car always starts.
Confirm the parking mode behaviour you want: motion or impact detection, time-lapse, or buffered recording, and verify the cam actually sleeps and wakes as intended over a full day before you trust it overnight.
Hardwiring may interact with how the car sleeps and, depending on your approach and region, with warranty considerations. When in doubt, a professional install is cheap insurance against a flat battery or a damaged trim panel.
Do not buy if
When NOT to buy on the headline number (and what to do instead)
The fastest way to waste money here is to optimise the wrong spec. These are the buying mistakes that look smart on paper and disappoint in the footage or the cabin.
!Do not buy on the 4K label alone
A 4K number with a weak sensor and low bitrate gives you a high-resolution picture of noise at night. If you can only check one spec, check the sensor: a 1080p or 4K STARVIS 2 cam will out-perform a generic 4K cam in exactly the low-light moments that matter. Resolution is a ceiling, not a guarantee.
!Do not pick a bulky screen cam for a Model 3
A large camera with a built-in screen stuck to the glass fights the entire point of a Model 3 interior, and most owners tire of it fast. Favour a screenless or slim body that hides behind the mirror. If you want a screen for setup, choose a compact one and accept it as a minor compromise, not a centrepiece.
!Do not trust a lithium-battery cam for hot-climate parking
If your car parks outdoors in summer, a lithium-ion cam baking on the windscreen can degrade or swell over time. For sustained heat a supercapacitor cam is the more durable instrument. Do not buy a lithium unit for heavy parking-mode use in a hot region and expect it to last.
!Do not skip the hardwire and the voltage cutoff
Running parking mode without hardwiring and a conservative cutoff is how a Model 3's 12V battery ends up flat. The cam's low draw only helps if it actually stops drawing at a safe threshold. Hardwire it, set the cutoff cautiously, and verify the car still starts after a long park before you rely on it.
!Do not expect a cheap rear cam to read plates at night
Bundled rear cameras on budget kits are usually 1080p with modest sensors, useful for context and rear-end evidence but not for reading a plate in the dark. Value the rear channel for what it is, and if night-time rear plate capture is a real need, budget for a better dedicated rear unit rather than assuming the bundle covers it.
Questions
Tesla Model 3 dash cam FAQ
What is the best dash cam for a Tesla Model 3 overall?
For most Model 3 owners the VIOFO A229 Pro is the best balance, because it leads on the spec that decides night footage, a Sony STARVIS 2 sensor, while staying screenless so it hides behind the mirror, and it supports a low-draw parking mode through its hardwire kit. If your priority is cloud upload and remote alerts you would pick the BlackVue DR970X Plus instead, and if you want STARVIS 2 quality for less, the 70mai A810 is the value route. The right answer depends on whether you weight image quality, cloud, stealth or price highest.
Do I even need a dash cam if my Tesla has Sentry Mode?
Sentry Mode and the built-in cameras are genuinely useful, but an aftermarket cam adds things they do not do well. Sentry records locally and leans on the battery, so a thief who takes the car or removes the camera takes the evidence too; a low-draw or cloud-connected cam closes that gap. A dedicated front cam also gives a better sensor, higher bitrate and audio than the car's shared wide cameras. Think of the aftermarket cam as a front-focused, more resilient complement to Sentry rather than a replacement.
Is sensor quality really more important than 4K resolution?
For night-time plate capture, yes. Resolution sets the maximum detail a frame can hold, but the sensor decides how much of that detail is real signal rather than noise in low light. A Sony STARVIS 2 sensor captures a cleaner image in the dark than a generic sensor at the same megapixel count, so a 4K STARVIS 2 cam will out-read a plate at night that a cheap 4K cam turns to mush. Read the sensor line before you read the resolution number.
Will a dash cam drain my Model 3's 12V battery in parking mode?
It can if you set it up carelessly, because the Model 3's 12V system is low-capacity and topped up on a schedule. The safeguards are to hardwire the cam rather than run it off the socket, choose a unit with low parking-mode draw, and set a conservative voltage cutoff so the cam stops drawing before the battery falls too far. Done that way, a low-draw cam can monitor overnight without leaving you with a car that will not wake. Verify the car still starts after a long park before you trust it.
Should I get a supercapacitor or a lithium-ion dash cam for a Tesla?
For a car that parks outdoors, a supercapacitor cam is the more durable choice. The cabin and windscreen zone get very hot in summer, and a lithium-ion cell degrades and can swell under sustained heat, while a supercapacitor tolerates high temperatures far better. The trade is that supercapacitors hold less reserve charge, which is rarely an issue for a hardwired cam. If you park in shade or a garage the difference matters less, but in a hot climate it is a real reliability factor.
What is the most stealthy dash cam for a Model 3 interior?
The Garmin Dash Cam Mini 2 is the most discreet here, roughly the size of a key fob and effectively invisible behind the mirror, which suits the minimalist cabin. The trade is that it is 1080p with an ordinary sensor, so it trails the 4K STARVIS 2 cams at night. If you want stealth without giving up the better sensor, a screenless 4K cam like the VIOFO A229 Pro or the slim cylindrical BlackVue DR970X Plus is the next most discreet option.
Can a dash cam upload footage to the cloud if my Tesla is stolen or hit while parked?
Only a cloud-capable cam can. In this group that is the BlackVue DR970X Plus, which can push an event clip off the vehicle over WiFi or an optional LTE connection when an impact or parking event occurs. That defeats the main weakness of any local-only recorder, including Tesla's Sentry Mode: if the footage is already off the car, taking the car or the camera does not take the evidence. The others store locally, so you keep the footage only if the card and camera survive.
Do I need a front and rear dash cam for a Tesla Model 3?
It depends on what you want to protect against. A front cam with a strong sensor covers the most common and most contested incidents. A rear camera adds evidence for rear-end collisions and tailgating, which is why a 2-channel setup like the VIOFO A229 Pro, or a budget front-and-rear kit like the RedTiger F7N, appeals to many owners. Just hold realistic expectations for budget rear cameras at night, since they are usually 1080p with modest sensors aimed at context rather than plate reads.
Is 1080p enough for a Tesla dash cam, or should I insist on 4K?
1080p is enough for general evidence and for capturing the scene of an incident, especially with a good sensor. Where 4K pulls ahead is fine detail at distance, such as a plate several cars away, because it has more pixels to spend on small high-contrast features. The nuance is that a 1080p cam with a STARVIS 2 sensor can beat a cheap 4K cam at night. If night-time plate reads matter to you, aim for 4K with a strong sensor; if you mainly want a clear record of events, a good 1080p cam is sufficient.
Can I install and hardwire a dash cam in a Model 3 myself?
Many owners do. The job is positioning the cam behind the mirror, routing the cable up into the headliner and down the A-pillar trim with a plastic pry tool, tapping a suitable power point with an inline-fused hardwire kit, and setting a conservative voltage cutoff for parking mode. The Model 3's low-voltage layout differs from a combustion car, so follow a Tesla-specific wiring guide for the exact tap point. If working near the fuse area or trim makes you uneasy, a Tesla-experienced installer is inexpensive insurance against a flat battery or damaged panels.
Affiliate disclosure. This comparison is reader funded. Some links here are affiliate links, and a qualifying purchase made through one may earn us a small commission at no added cost to you. The matrix and the verdicts are built on sensor, draw and form-factor merits, never on what pays most. As an Amazon Associate I earn from qualifying purchases.
This is a buying guide, not an installation or electrical service. Hardwiring touches your car's low-voltage system; if you are unsure, have a Tesla-experienced installer do the work to protect your 12V battery and trim.